
This article covers how to automate follow-up for contacts who submit a Keap™ landing page form, using either Easy Automations or Advanced Automations. Before setting up automation, ensure the landing page has been published.
Use Easy Automation to Follow Up After a Landing Page Submission
-
Navigate to Automation, then select Easy.
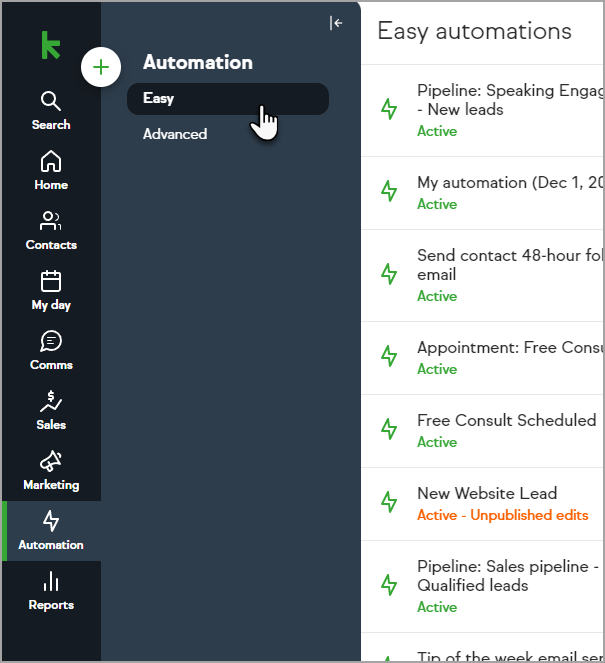
The screenshot above shows the Easy Automations list in Keap. Note: This image is hosted externally and must be migrated to guide-media before publishing.
Select the plus icon to create a new automation.
-
Select Easy Automation.
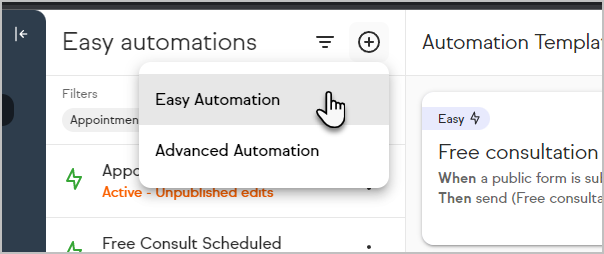
The screenshot above shows the automation type selector with Easy Automation available. Note: This image is hosted externally and must be migrated to guide-media before publishing.
Enter a name for the Easy Automation.
-
Select the When section.
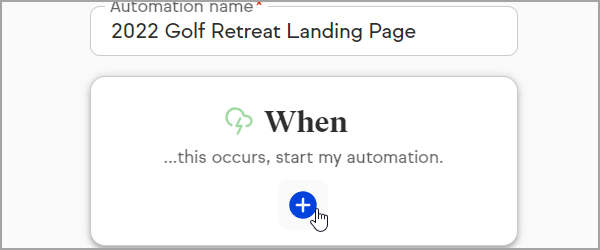
The screenshot above shows the When section in the Easy Automation builder.
-
Choose Landing page form submitted.
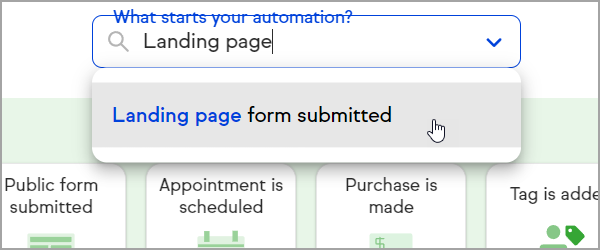
The screenshot above shows the landing page form trigger selected in the Easy Automation dropdown.
-
Configure the trigger to fire when any landing page form is submitted, or select a specific landing page form.

The screenshot above shows the landing page form selector in the Easy Automation trigger settings.
-
Select Next.
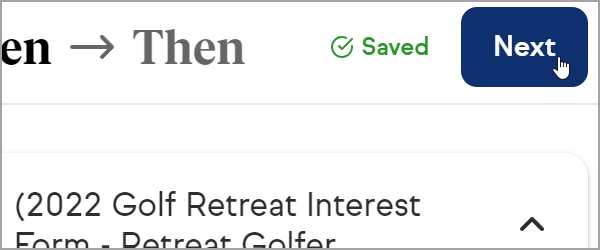
The screenshot above shows the Next button in the Easy Automation trigger setup.
Define the Then Automations — the actions Keap performs when the trigger fires, such as sending an email, adding a tag, or assigning a task.
Select Preview to review the automation.
-
Select Publish to activate the automation.
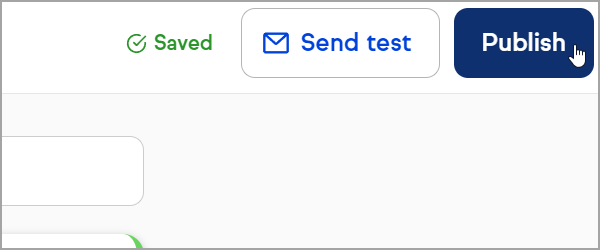
The screenshot above shows the Publish button in the Easy Automation preview screen.
Use Advanced Automation to Follow Up After a Landing Page Submission
-
Navigate to Automation, then select Advanced.
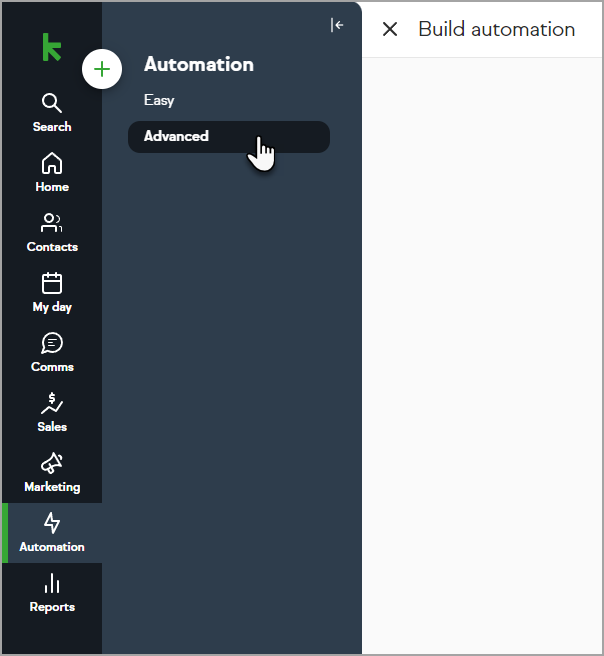
The screenshot above shows the Advanced Automations list in Keap.
Select the plus icon to create a new automation.
-
Select Advanced Automation.
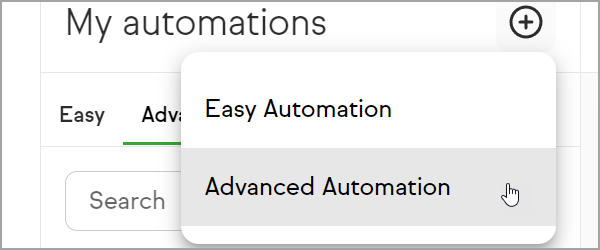
The screenshot above shows Advanced Automation selected in the automation type selector.
Enter a name for the Advanced Automation.
Drag the Landing Page Goal onto the canvas.
-
Enter a name for the Landing Page Goal.

The screenshot above shows the Landing Page Goal element on the Advanced Automation canvas with the name field.
Select the Landing Page Goal icon on the canvas.
Select View and edit.
-
Select the landing page to use as the trigger.
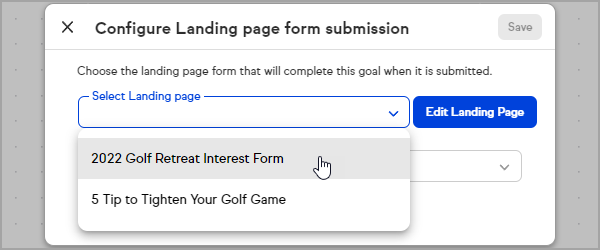
The screenshot above shows the landing page selector in the Landing Page Goal settings.
-
Select the form on the landing page to use as the trigger.
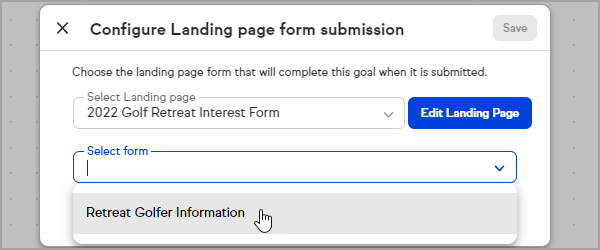
The screenshot above shows the form selector in the Landing Page Goal settings.
-
Select Save.
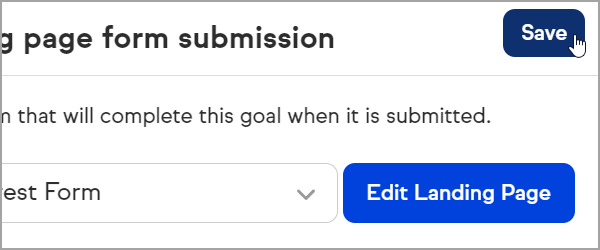
The screenshot above shows the Save button in the Landing Page Goal settings.
Drag a Sequence onto the canvas and configure the follow-up steps — such as emails, tasks, or tag changes — to run after the landing page form is submitted.
Select Publish to activate the automation.
Frequently Asked Questions
What does this article cover?
This article covers how to automate follow-up for landing page form submissions using Easy Automations and Advanced Automations in Keap.
What if no landing pages have been created yet?
Both Easy Automations and Advanced Automations include a link to create a new landing page directly from within the trigger setup screen.
Can automation be triggered from a landing page that does not have a form?
The Landing Page form triggers require a form to be present on the landing page. However, if the landing page uses an Appointment Block or Checkout Form Block, automation can be created using their respective goals in Advanced Automations.
Are landing page forms the same as forms created in Public Forms?
No. Landing page forms are only available for use on landing pages and are separate from forms created in the Public Forms section.
What if a landing page has more than one form?
Both Easy Automations and Advanced Automations prompt for which form on the landing page to use as the trigger. To automate follow-up from multiple forms on the same landing page, create a separate automation for each form.
Comments
0 comments