
Why Your Business Profile Settings Matter
Your business profile settings control the information that appears on customer-facing documents — including invoices, quotes, receipts, and automated email communications. Keeping your business profile complete and accurate ensures that your contacts see the correct business name, address, logo, and contact details every time they receive a document or automated message from you. Your default time zone and language settings also affect when automated emails are sent and how dates, times, and currency are displayed in system-generated communications.
This article covers the four main settings areas in your Business Profile: Business Details, Default Time Zone, Default Language, and Brand Settings.
How to Open Your Business Profile
Click your user avatar in the upper-right corner of the app to open the account menu. In the account menu, click Settings to open the Settings page.

The account menu appears when you click your user avatar. The Settings option is listed in the menu. Clicking Settings opens the Settings page where the Business Profile section is accessible.
On the Settings page, click Business profile to open the Business Profile settings.
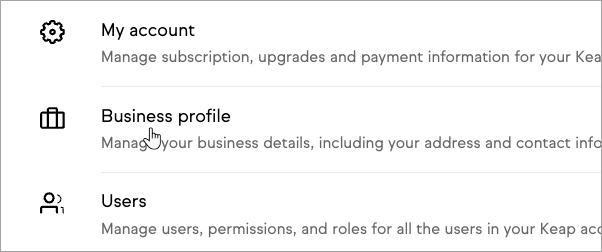
The Settings page displays a navigation menu on the left side. The Business profile option is listed in the navigation. Clicking Business profile opens the Business Profile settings page where Business Details, Default Time Zone, Default Language, and Brand Settings are all configured.
Important: After making changes to any field on the Business Profile page — except the logo — scroll to the bottom of the page and click Update business profile to save your changes. Changes that are not saved by clicking Update business profile will be lost when you navigate away from the page.
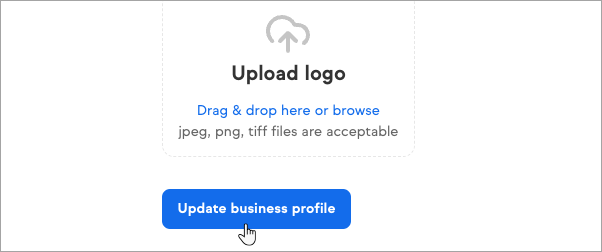
The Update business profile button is located at the bottom of the Business Profile settings page. Clicking the button saves all changes made to the Business Details, Default Time Zone, and Default Language fields on the page.
Business Details
The Business Details section contains your business name, address, phone number, and other core business information. This information appears on customer-facing documents such as invoices and quotes, and is included in the footer of automated marketing emails to meet CAN-SPAM compliance requirements. After filling in or updating the Business Details fields, click the Save company details button at the bottom of the Business Details section to save your changes.
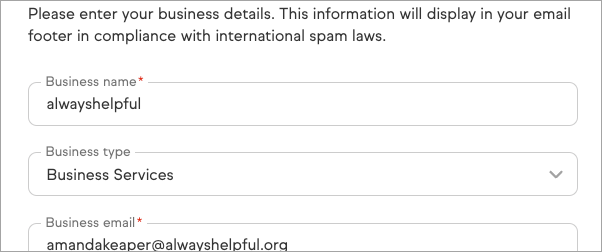
The Business Details section displays input fields for your business name, address, phone number, and related information. The Save company details button is located at the bottom of the Business Details section. Click Save company details after updating any field in the Business Details section.
Default Time Zone
The Default Time Zone setting controls the time zone used for all time-stamped records generated in the app — including contact activity logs, automation trigger timestamps, and the default send time for automated emails. If you plan to send automated emails based on your own business hours rather than each recipient's local time, your Default Time Zone must be set correctly for emails to go out at the intended time.
If you prefer to send automated emails based on each recipient's local time zone instead of your business time zone, you can configure that option in the automation builder using delay timers. See how to use delay timers to send emails based on the recipient's time zone for instructions.

The Default Time Zone section displays a drop-down field for selecting your business time zone. Click the drop-down to see the list of available time zones and select the time zone where your business operates.
Default Language
The Default Language setting controls how dates, times, and currency values are formatted in system-generated communications — such as appointment confirmations, payment receipts, and automated notifications — sent to contacts whose individual language preference is not set on their contact record. Select the language and regional format that matches your primary customer base.

The Default Language section displays a drop-down field for selecting the default language and regional format. The selected language controls how dates, times, and currency are displayed in automated communications sent to contacts who do not have an individual language preference set on their contact record.
Brand Settings: Upload Your Logo
The Brand Settings section allows you to upload your business logo to the Image Library. Your logo is used on customer-facing pages and documents, including quotes, invoices, and other communications sent to contacts.
To upload your logo, click the logo upload area in the Brand Settings section and select your logo image file from your device.
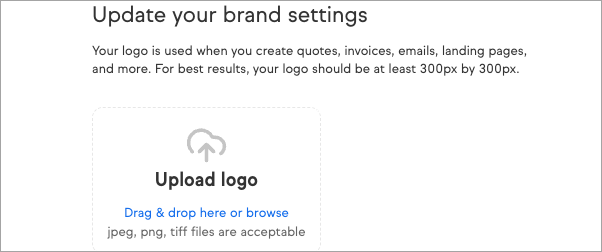
The Brand Settings section displays the logo upload area with an image placeholder. Clicking the upload area opens a file picker to select your logo image from your device. After selecting the logo file, the logo uploads and saves automatically — you do not need to click Update business profile to save a logo change.
Note: Logo changes save automatically. You do not need to click Update business profile after uploading or changing your logo. For all other fields on the Business Profile page, clicking Update business profile is required to save your changes.
Comments
0 comments