The Contact Form Widget can be fully customized, to perfectly fit your needs and your website style.
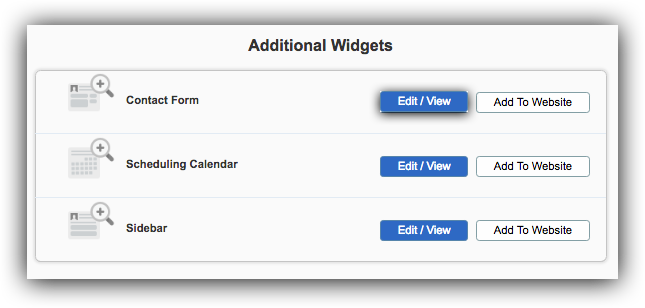
To start customizing the Contact Form, navigate to Online Presence> Website Widgets. Under Additional Widgets click on Edit/View for the Contact Form Widget.
Set form layout and profile options.
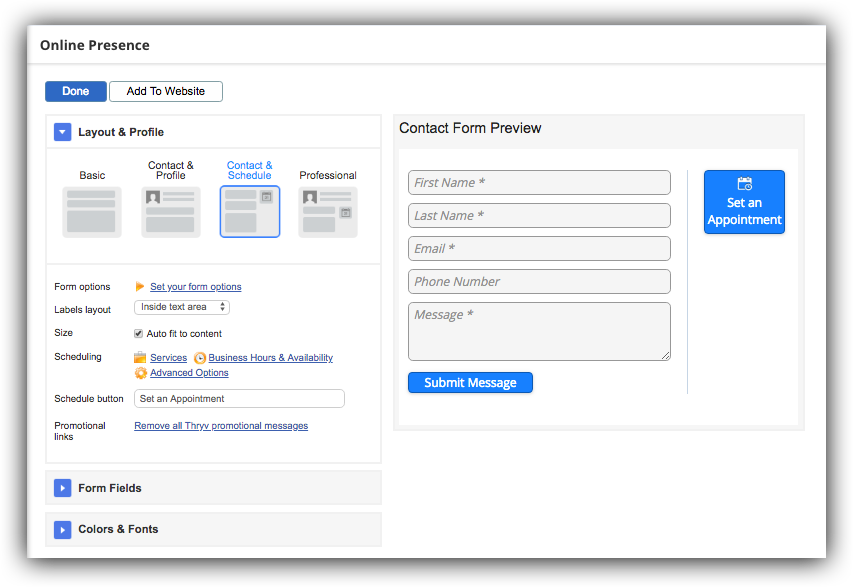
- Choose your preferred contact form layout out of the 4 available options - choose to include your business info or add an online scheduling option.
- If you haven't done so already you can set all your account and profile services, using the relevant link.
- Change the form Invitation text. The invitation text will be displayed to clients only when you select a layout which includes profile.
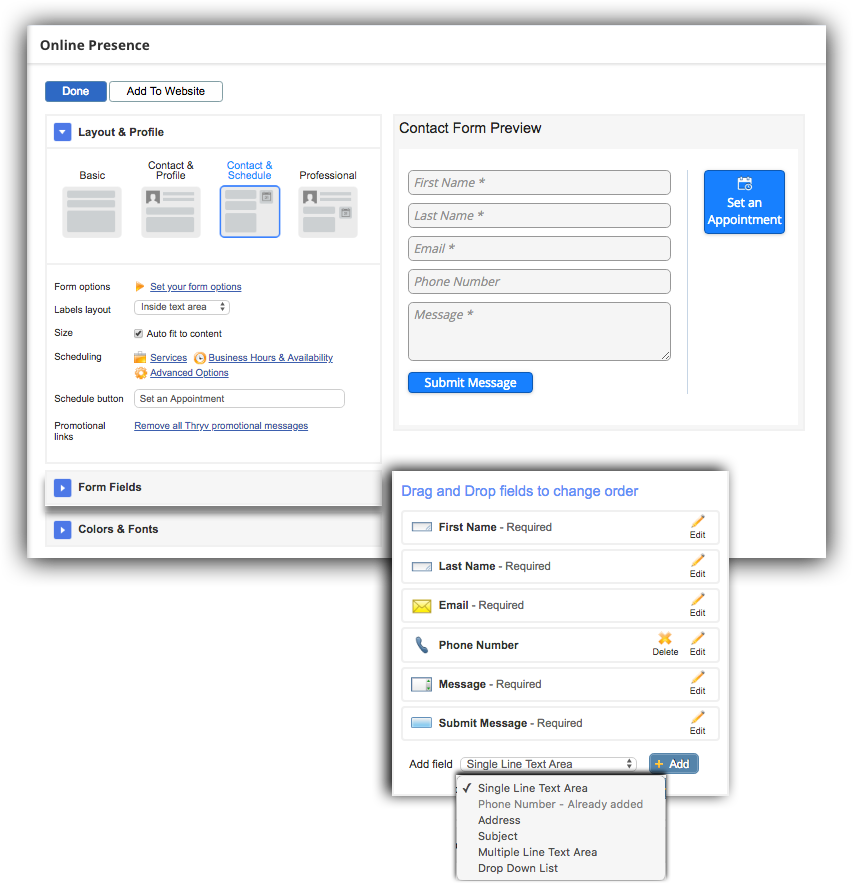
Add and edit the form fields
The contact form includes some basic fields. The default fields email - first name, last name, message - are mandatory and can not be removed or changed.
You can customize the fields label to translate to different languages.
Add as many fields as you need, set different field types: Single Line Text Area, Multiple Line Text Area, Phone Number, and Drop Down List.
You can set your fields labels in any language, and you can reorder the form fields by simply dragging & dropping the fields.
Store information from the Contact Form in the Client Card.
You can add the fields on the contact form to the clients card, so the information clients provide on the contact form will be saved in the client card fields.
Navigate to Settings>Client & Contact Info and add New Field. (Note: If a different CRM Term has been selected in Business Info>Advanced>Choose a Custom Term then the selected term will replace the word Client).
Set the field title same as you have on the Contact Form.
If you would the new field to only be used internally and not to be displayed to clients on Scheduling/ Payment/ 'Leave Details' forms, simple leave the boxes un-checked.
You can edit each field label and additional preferences by clicking the "Edit" icon next to it.
- Instructions - Set instructions to the field - which will appear beneath the field.
- Watermark - Add text to describe what input should be entered. The that will appear on the field before any input is given.
- Lines - Set the number of lines the input field will have, in case you selected Multiple Line Text Area.
- Default value - Set a default value that will be sent in case the client didn't enter any value.
- Required - Set the fields as a required field.
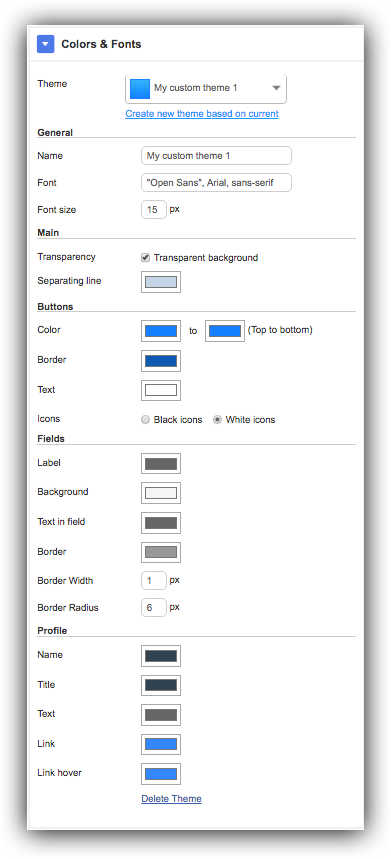
Edit your contact form style and colors.
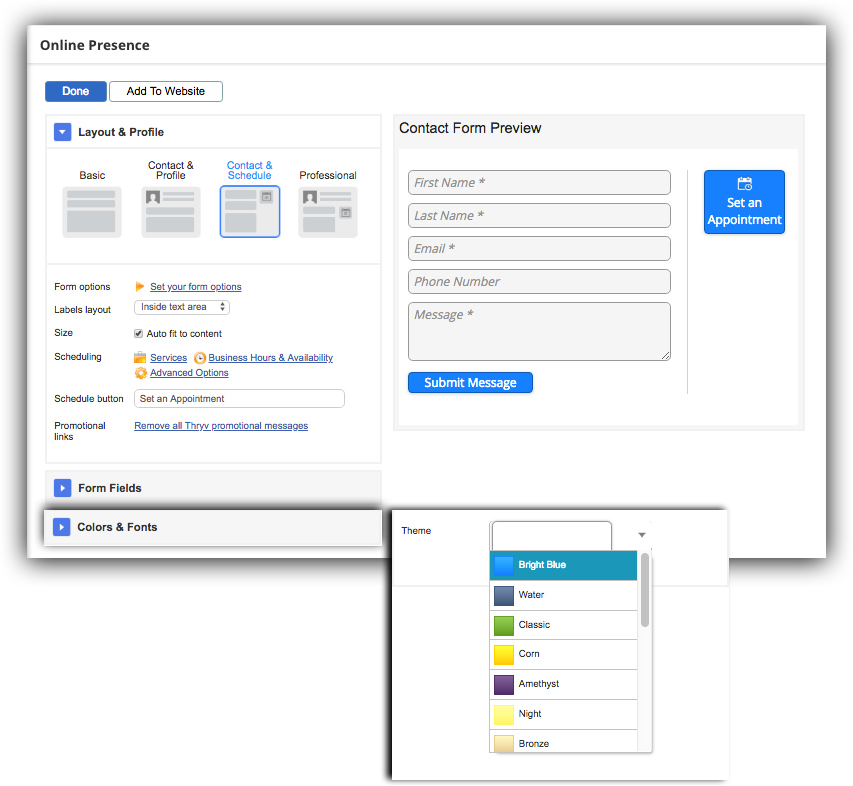
You can choose any of the predefined color theme or select New to personalize your theme.
If you create a new theme, it can then be used to customize your other widgets Like the LiveSite Widget.
Click Done to save changes, or click Add to Website to get the code needed to add the form to a webpage.
*Please note - any change you make will automatically apply to the contact form, so you won't need to re-add it to your website.

Comments
0 comments